Making sourdough bread at home is an incredibly rewarding experience that connects you with centuries of baking tradition. The aroma of freshly baked bread filling your home and the crispy crust paired with a tangy flavor make it all worth the effort. While the process may seem daunting at first, the satisfaction of pulling out a perfectly risen loaf from the oven will leave you feeling accomplished. Sourdough bread, with its distinctive taste and texture, is unlike anything you can find at the store, and learning how to make it from scratch gives you a sense of mastery over one of the oldest bread-making techniques.
Whether you’re an experienced baker or just getting started, this guide will take you step-by-step through the process of making sourdough bread at home. From preparing the sourdough starter to perfecting the rise, shaping, and baking, you’ll be well-equipped to create a loaf that is both delicious and rewarding. By the end of this guide, you’ll not only be able to make sourdough bread but also understand the magic behind the wild fermentation process that gives it such a unique flavor. Let’s begin this journey and transform your kitchen into a haven of homemade bread.
If you’re excited to start baking, why stop here? Want more delicious sourdough recipes? Check out our Sourdough Bread Bowl Recipe for a fun twist on traditional sourdough or try our Cinnamon Sugar Sourdough Bread for a sweet treat. Looking for a savory option? Explore our Sourdough Sandwich Bread Recipe and Lemon Blueberry Sourdough Bread for a refreshing flavor. Don’t forget to try Sourdough Banana Bread or Sourdough Discard Banana Bread if you have some starter to spare! Click on the links above and start baking today!
Getting Started with Sourdough Bread
What is Sourdough Bread?
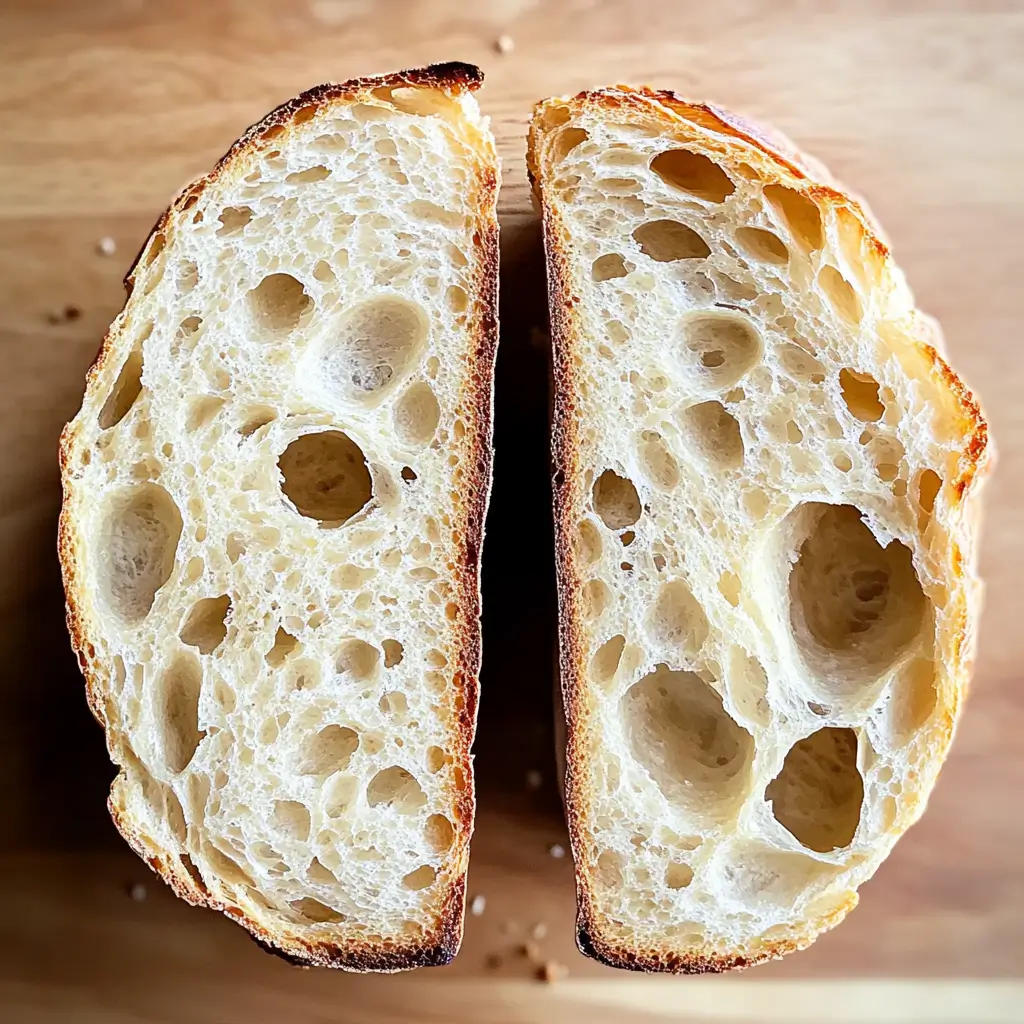
Sourdough bread stands apart from other types of bread because it uses natural fermentation instead of commercial yeast. This process relies on wild yeast and bacteria from the environment, which work together to leaven the dough and give it its signature flavor. Additionally, the long fermentation period allows the dough to develop a deep, tangy taste and an airy, chewy texture that you can’t get from store-bought bread.
Unlike bread made with commercial yeast, sourdough can be naturally preserved due to its low pH, which prevents harmful bacteria from growing. This makes sourdough not only a delicious option but also a healthier one.
Essential Ingredients for Sourdough Bread
To make sourdough bread, you’ll need just a few basic ingredients. Each one plays a vital role in creating the bread’s structure, flavor, and texture. For example, flour provides the necessary structure, while water hydrates the dough and activates the yeast.
| Ingredient | Purpose |
|---|---|
| Flour | Provides the main structure for the bread. Whole wheat or bread flour is preferred for a better rise. |
| Water | Hydrates the flour, activates the yeast, and contributes to the dough’s texture. |
| Salt | Enhances the flavor and controls yeast activity. |
| Sourdough Starter | The wild yeast and bacteria culture that naturally leavens the dough. |
These simple ingredients combine in unique ways to create the complexity of flavor and texture that sourdough is famous for. Moreover, choosing high-quality ingredients is essential for the best result. For instance, opt for unbleached, organic flour and clean, filtered water to avoid any interference with the fermentation process.
Creating Your Sourdough Starter
What is a Sourdough Starter?
A sourdough starter is the heart of your sourdough bread. It is a mixture of flour and water that, over time, captures wild yeast and lactic acid bacteria from the air and environment. This natural process is what gives sourdough its tangy flavor and unique texture. Without a starter, your bread would lack the leavening and the signature sourdough taste.
How to Make a Sourdough Starter from Scratch
Making your own starter is both rewarding and essential. Here’s how you can do it:
- Day 1: Combine equal parts of water and flour in a clean glass jar. For best results, use 100 grams of each. Stir the mixture thoroughly, ensuring there are no dry patches of flour.
- Day 2-4: Feed the starter daily by adding another 100 grams of flour and 100 grams of water. Stir well and cover the jar loosely to allow airflow. You’ll start to notice some bubbles appearing, and the mixture will begin to smell sour.
- Day 5-7: By now, your starter should be bubbly and sour-smelling. You’ll know it’s ready when it doubles in size within 4 to 6 hours of feeding and has a tangy scent. If you’re in a warmer climate, the process might speed up.
Maintaining Your Sourdough Starter
Once your starter is up and running, you need to maintain it. If you’re baking regularly, you can store it at room temperature and feed it daily. However, if you’re not baking often, refrigerate your starter and feed it once a week. Always discard a portion of the starter before feeding it to prevent it from growing too large.
The Process of Making Sourdough Bread
Mixing the Dough
After your starter is ready, the next step is to mix your dough. Here’s how:
- Combine ingredients: In a large mixing bowl, combine 500 grams of bread flour, 350 grams of water, and 100 grams of sourdough starter. Sprinkle in 10 grams of salt.
- Mix and rest: Stir until the dough begins to come together into a shaggy mass. Let it rest for 30 minutes – this step is called the “autolyse,” and it helps to activate the gluten in the flour, making it easier to knead.
Kneading and Stretch and Fold Method
Sourdough dough doesn’t require the typical kneading you might associate with bread. Instead, use the “stretch and fold” technique, which strengthens the dough without overworking it. This method improves the dough’s structure and elasticity without making it tough.
- Stretch the dough: After the dough has rested, stretch one side of the dough and fold it over to the center. Turn the bowl 90 degrees and repeat. Do this 4-5 times, covering the entire dough.
- Let it rise: Cover the dough and let it rest for 30 minutes. Repeat this process for 3-4 hours, every 30 minutes. After each stretch and fold session, the dough will become smoother and more elastic.
Bulk Fermentation
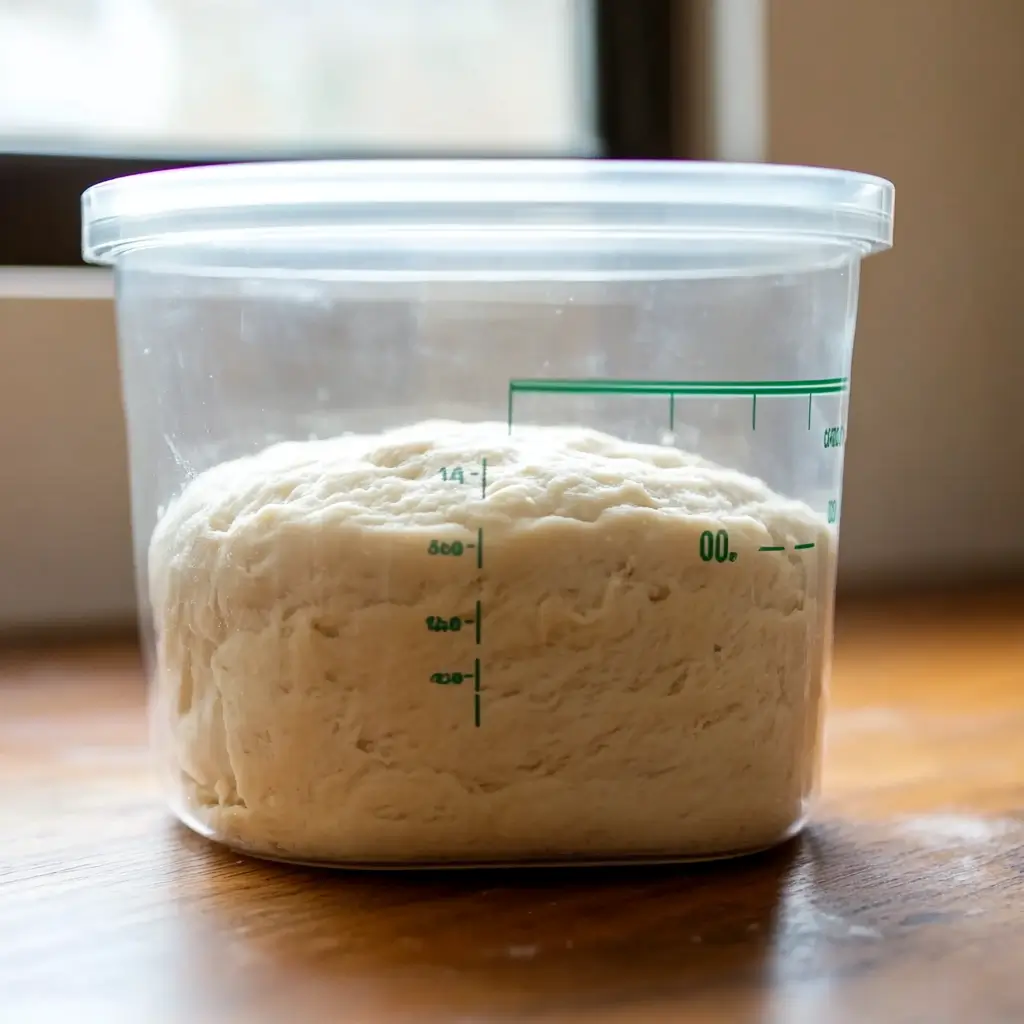
This is the longest step in making sourdough bread, but it’s essential for developing flavor. While it takes time, this is when the wild yeast and bacteria begin their work.
- Timing: Bulk fermentation typically lasts 4-6 hours at room temperature, or you can let it rise overnight in the fridge for a slower fermentation. This slow fermentation can enhance the flavor further.
- Signs it’s ready: The dough should have doubled in size, and you should notice small bubbles forming on the surface. The dough will also become airy and slightly sticky.
Shaping the Dough
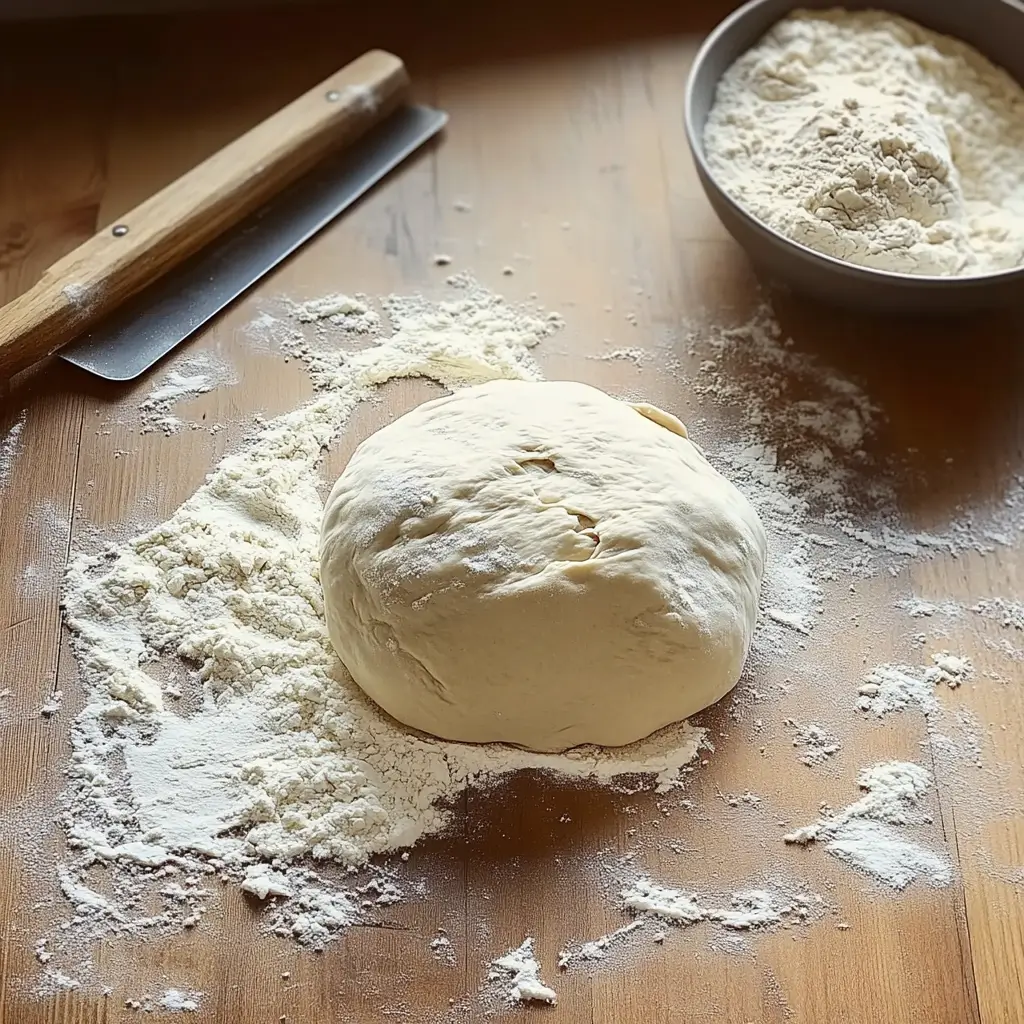
Once the dough has finished bulk fermentation, it’s time to shape it. This step is crucial for creating the perfect texture and ensuring an even rise during baking.
- Turn the dough out: Place the dough on a floured surface. Gently shape it into a round or oval shape, depending on your preference.
- Tighten the dough: Create surface tension by folding the dough over itself and gently pulling the edges towards the center.
- Rest and rise: Allow the dough to rest for 15-20 minutes before performing a final shaping, which will make the dough tighter and more defined.
Final Proofing and Resting
Once the dough is shaped, it needs to rise again. This is the final proofing stage. If you want to take extra precautions to enhance flavor, you can proof your dough in the fridge overnight.
- Proofing time: Typically, the dough should proof for 2-4 hours at room temperature. However, if you want to slow the process, you can let the dough rise in the fridge overnight.
- Poke test: To check if the dough is ready, gently poke it with your finger. If it springs back slowly, it’s ready to bake.
Baking Your Sourdough Bread
Preparing Your Oven
Before you bake your bread, preheat your oven to 450°F (232°C). If you have a Dutch oven, place it inside to heat up as well. The Dutch oven will help trap steam, which is crucial for getting that perfect crust. It’s important to preheat for at least 30 minutes to ensure your oven is evenly heated.
Scoring the Dough
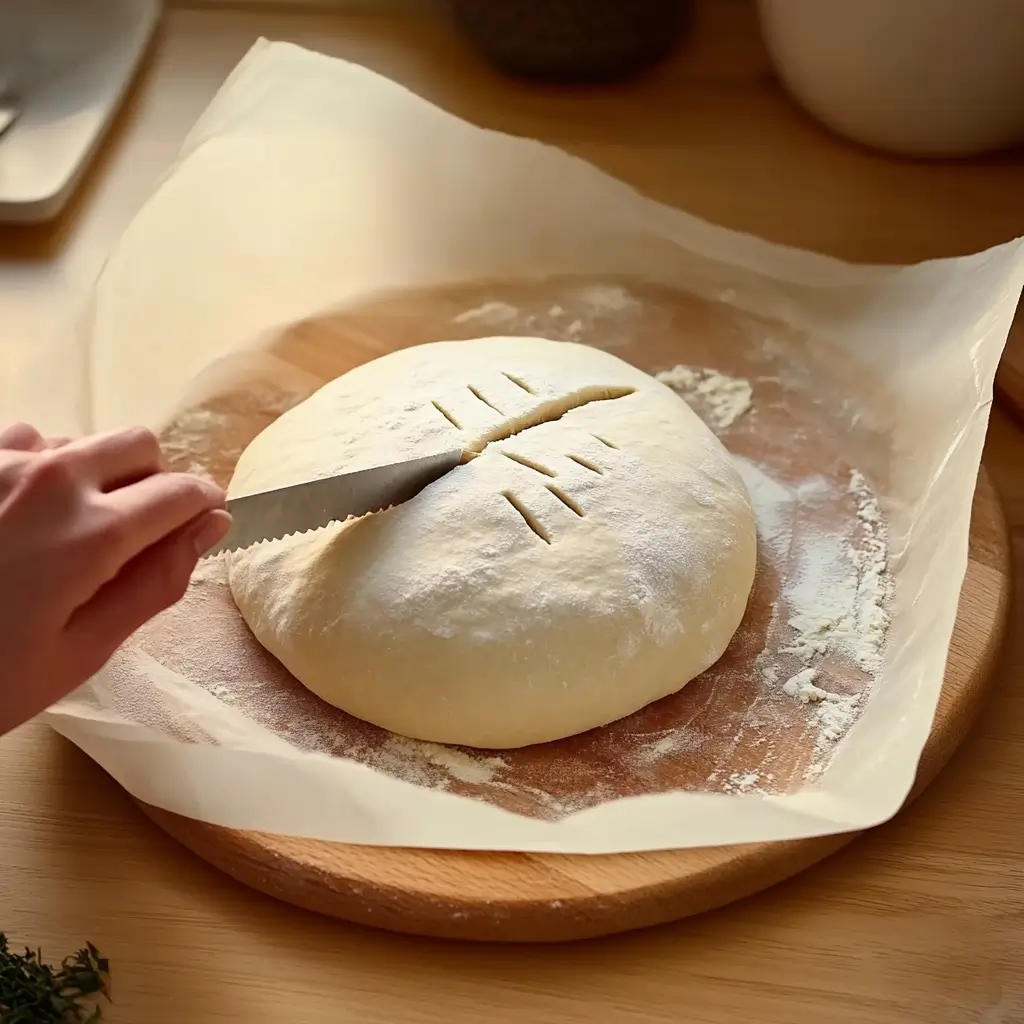
Scoring is the process of making shallow cuts on the surface of your dough just before baking. This allows the bread to expand evenly in the oven. Use a sharp razor blade or a lame to score the dough in a pattern of your choice. The slashes should be about 1/2 inch deep, which will give the bread a beautiful rise.
Baking and Timing
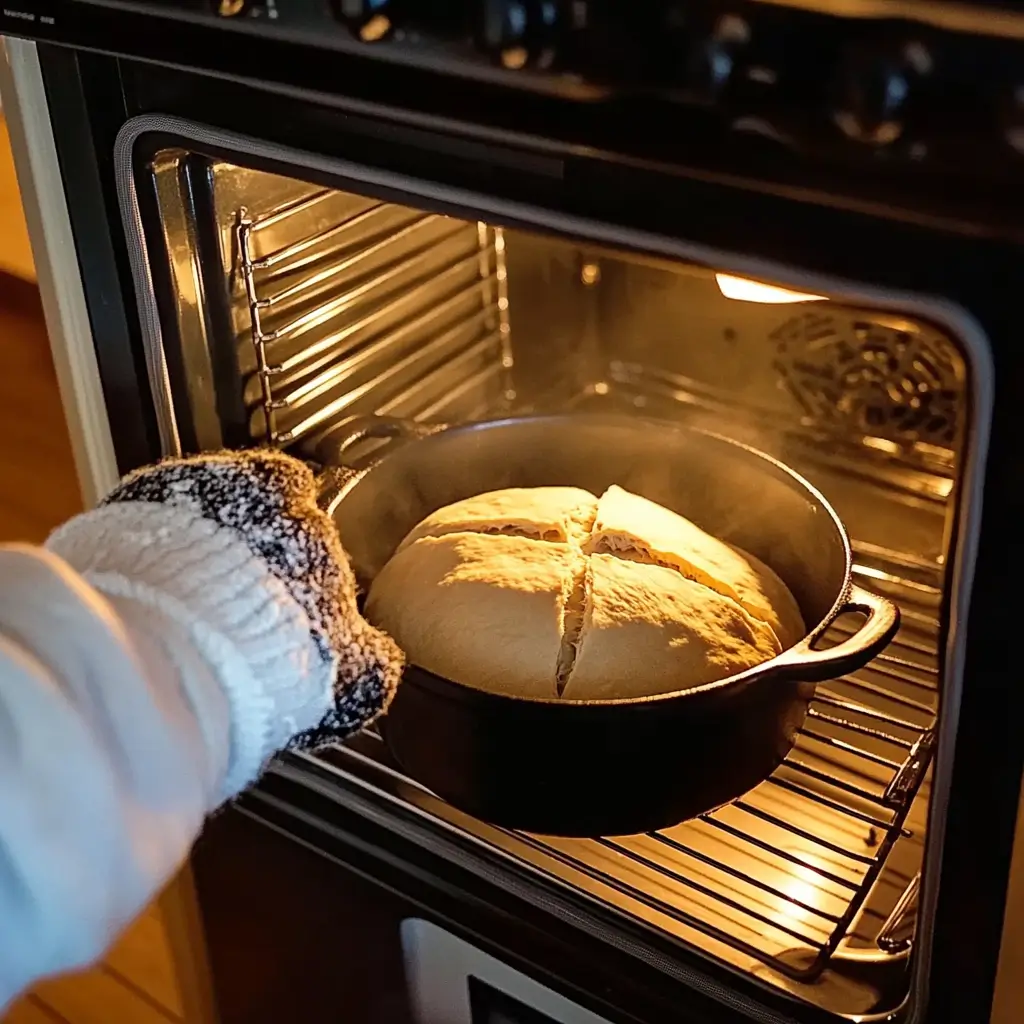
- Bake covered: Place your dough inside the preheated Dutch oven, cover it, and bake for 20-25 minutes. The steam trapped in the Dutch oven will help create the crispy, golden crust you’re looking for.
- Bake uncovered: After 20-25 minutes, remove the lid and continue baking for another 20 minutes to allow the crust to brown and crisp up.
- Check doneness: The bread is done when it has a golden-brown crust and sounds hollow when tapped on the bottom. Alternatively, you can check the internal temperature – it should be around 200°F (93°C).
Troubleshooting Common Sourdough Issues
My Dough Didn’t Rise Properly
If your dough didn’t rise, the most likely cause is an inactive starter. Ensure your starter is bubbly and active before using it. Additionally, make sure your environment is warm enough to encourage fermentation – ideally, between 75-80°F (24-27°C).
My Bread is Too Dense
Dense bread can result from insufficient fermentation or under-proofing. Try giving your dough more time to rise, as under-fermented dough will produce a denser loaf. Also, make sure you’re using the correct technique when shaping and scoring.
Storing and Enjoying Your Sourdough Bread
Storing Sourdough Bread
To keep your bread fresh, store it in a paper bag or wrapped in a clean kitchen towel. Avoid plastic as it can make the crust soggy. For longer storage, you can freeze your sourdough bread.
Enjoying Your Homemade Sourdough
Sourdough bread is versatile and can be enjoyed in many ways. Try it toasted with butter, paired with soup, or used to make sandwiches. The possibilities are endless!
FAQ
How long does it take to make sourdough bread at home?
A: From start to finish, it typically takes about 24-48 hours, depending on your fermentation schedule. This includes making and maintaining your starter, the resting periods, and the bulk fermentation.
Can I make sourdough bread without a starter?
A: No, a starter is essential to leaven the bread and give it its signature flavor. It contains the natural yeast and bacteria required for fermentation.
How do I know when my sourdough is ready to bake?
A: Your sourdough is ready to bake when it has doubled in size, passes the poke test (the dough slowly springs back), and has bubbles visible throughout. The dough should also feel airy and slightly sticky.
Conclusion
Baking sourdough bread at home is an incredibly rewarding process that can yield delicious results. From nurturing your starter to baking the perfect loaf, each step offers a chance to connect with the art of breadmaking. With patience and practice, you’ll soon be able to enjoy fresh, homemade sourdough bread whenever you like. Don’t be afraid to experiment with different flours or fermentation times to create a loaf that perfectly suits your tastes.

