If you’ve ever wanted to bake the perfect English scones, this simple and delicious recipe will guide you every step of the way. The soft, golden crust, tender texture, and perfect balance of sweetness make these scones ideal for afternoon tea or any occasion. With a few essential ingredients and a little patience, you can create homemade English scones that are just as good as those from your favorite tea room. Let’s get started!
But what makes them truly special? It’s all about the right technique and ingredients. In this guide, we’ll show you how to make perfect English scones right in your own home. With a few simple steps, you’ll master the art of baking these delicious treats, and soon you’ll be enjoying them warm with clotted cream and jam, just like they do in Britain.
If you’re a fan of fruity scones, the English Scones Recipe will be right up your alley. For another twist, try our Chocolate Chip Scone Recipe, which combines rich chocolatey goodness with the same fluffy texture.
What Are English Scones Recipe ?
Before diving into the recipe, let’s take a moment to understand what makes English scones unique.
Key Features of English Scones
English scones are a staple of British cuisine, typically served with tea, but they are enjoyed at any time of the day. They are fundamentally different from the sweet, dry, cake-like scones often found in the United States.
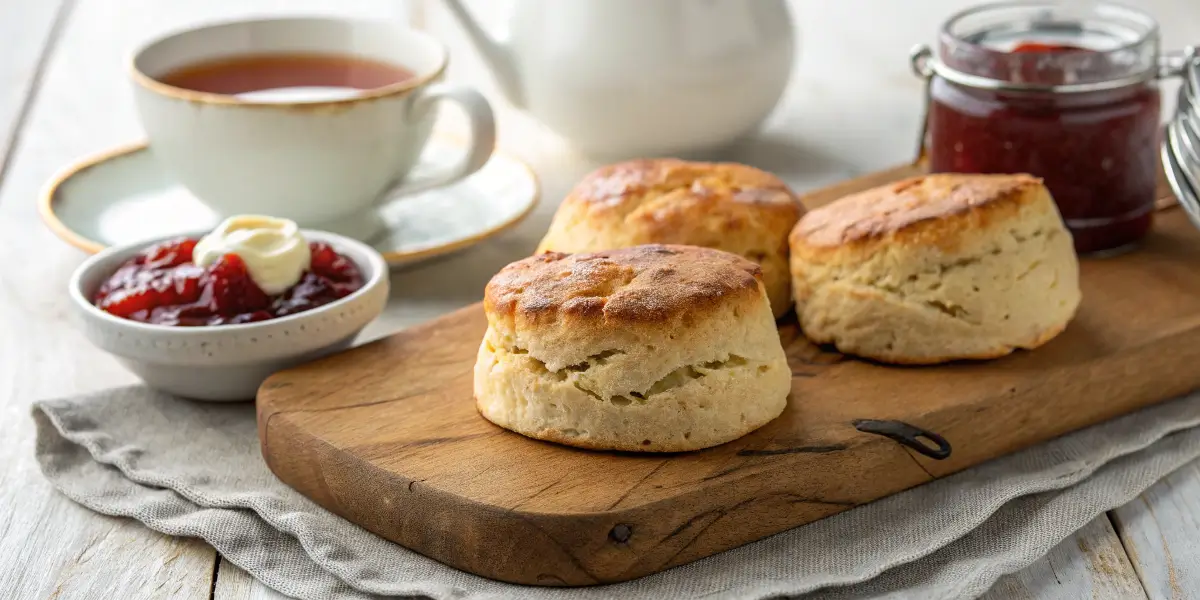
- Texture: English scones are light, fluffy, and slightly crumbly. The dough should not be too wet or too dry, and the scones should rise beautifully in the oven, achieving that perfect fluffy texture. They should have a light, airy interior and a slightly crispy exterior that is golden brown.
- Flavor: Unlike their American counterparts, which are often sweeter and more cake-like, English scones have a subtle sweetness that makes them perfect for pairing with jam, clotted cream, or even savory toppings. Their flavor is delicate enough that they can be enjoyed in various forms, sweet or savory.
- Occasions: Traditionally, English scones are served as part of an afternoon tea, a quintessential British ritual that includes finger sandwiches, pastries, and, of course, scones. But they’re also great for breakfast, brunch, or as a snack during any time of the day. They are perfect for pairing with a variety of drinks, from tea to coffee.
Once you’ve perfected this English Scones Recipe, consider trying another scone variation, like our Pumpkin Scones Recipe, which offers a warm, spiced alternative for fall baking.
The Essential Ingredients for Classic English Scones Recipe
For the perfect scone, you don’t need a long list of ingredients. Each one plays an important role in achieving that delicate texture and light flavor. Here’s what you’ll need:
Ingredients Table
| Ingredient | Quantity | Notes |
|---|---|---|
| Self-raising flour | 225g | If not available, use plain flour with added baking powder (1 tsp per 150g). |
| Butter | 110g | Cold butter ensures a flaky texture. |
| Milk | 150ml | Whole milk is preferred, but plant-based alternatives like almond or oat milk work well too. |
| Caster sugar | 25g | Adds just the right touch of sweetness. |
| Pinch of salt | – | Balances out the sweetness. |
| Egg (for glazing) | 1 | Optional for a golden, glossy finish. |
Pro Tip: Using cold butter is key to creating those light, flaky layers. The colder your ingredients, the better your scones will rise.
Step-by-Step Instructions for Making English Scones Recipe
Now that you have your ingredients ready, let’s dive into the baking process.
1. Preheat Your Oven and Prepare Your Baking Tray
Start by preheating your oven to 220°C (200°C fan) or gas mark 7. The high temperature ensures that your scones bake quickly and develop a golden, crispy crust. Line a baking tray with parchment paper to prevent the scones from sticking.
This is a crucial first step because the oven needs to be hot enough to create the signature rise in your scones. The heat will help create a firm outer shell while keeping the interior soft and airy.
2. Mix the Dry Ingredients
In a large mixing bowl, sift together the self-raising flour, salt, and caster sugar. Sifting helps to aerate the flour, which will result in lighter scones. The purpose of sifting is to break up any lumps in the flour and ensure that the ingredients are evenly distributed throughout the dough.
As you sift, think about the texture of your scones. You’re aiming for a light, airy dough, and sifting helps to achieve that by allowing air to enter the flour.
At this stage, you can also add a pinch of baking powder if you’re using plain flour. Self-raising flour already contains baking powder, but if you’re substituting, adding a teaspoon per 150g of plain flour ensures the scones will rise properly.
3. Incorporate the Butter
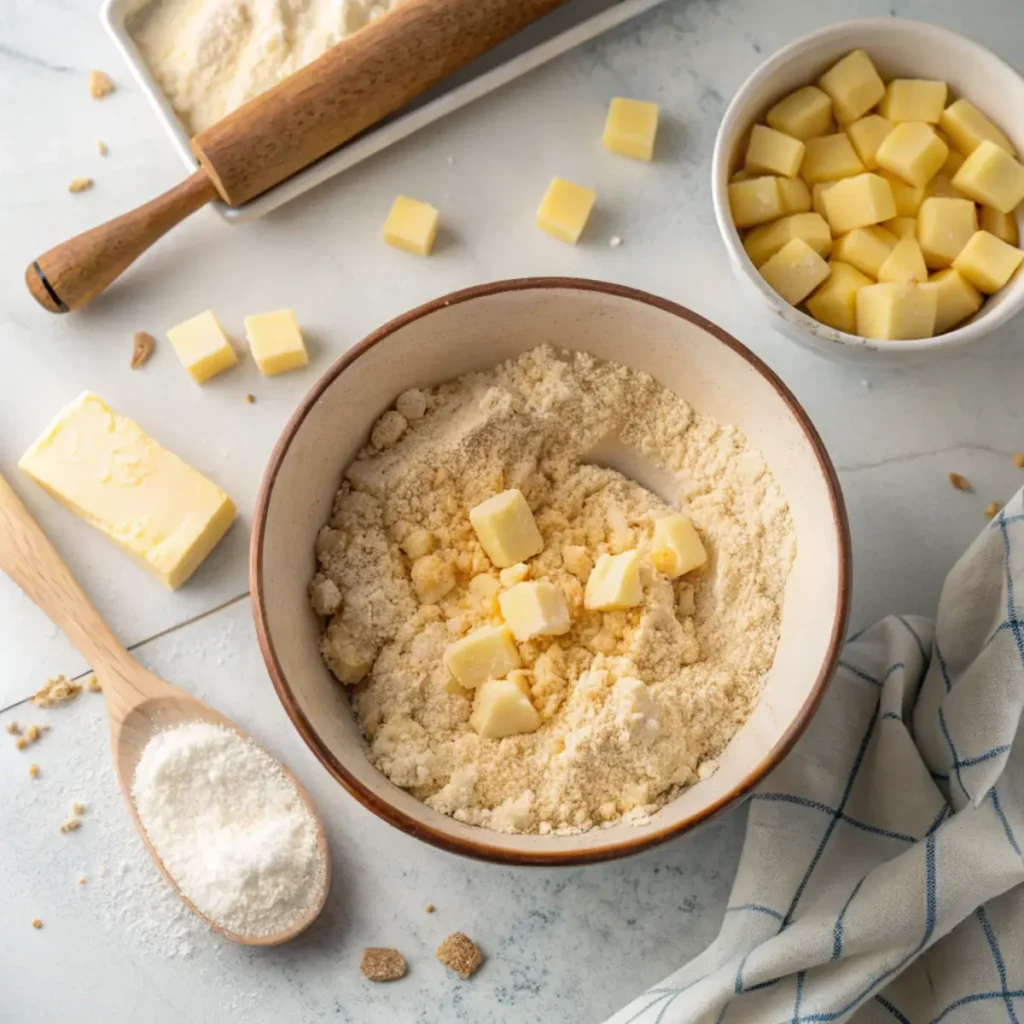
Now it’s time to add the cold butter to your flour mixture. Cut the butter into small cubes before adding it to the dry ingredients. The cold butter ensures that your scones will have those flaky layers we all love.
The next step is crucial: use your fingertips to rub the butter into the flour. Work quickly so the butter doesn’t warm up too much. Your goal is to break the butter into small pieces and coat them with flour. As you rub the butter in, the mixture will start to resemble breadcrumbs.
Take care not to overwork the dough here. If you rub the butter in for too long, you’ll lose that crucial flaky texture. Stop when the mixture looks like coarse breadcrumbs.
At this stage, if you want to make fruit scones, you can add dried fruit such as raisins, currants, or sultanas. Just fold them into the mixture gently to avoid overworking the dough.

4. Add the Milk
Create a well in the center of the flour and butter mixture. Pour in the milk, and gently stir it with a spoon or a knife. The goal is to mix the liquid into the dry ingredients just enough to form a dough. Be sure not to overmix, or you’ll risk making tough scones.
If your dough feels too dry, add a little more milk. On the other hand, if it feels too sticky, sprinkle a bit more flour over the top. The dough should be soft and slightly sticky, but it should come together easily without falling apart.
Milk is the key ingredient that binds everything together. If you prefer a richer scone, you can replace some of the milk with double cream for a slightly more decadent result.
5. Shape and Cut the Dough
Turn the dough out onto a floured surface. Gently knead it a couple of times to bring it together. You don’t need to knead it excessively—just enough to form a rough ball. Over-kneading will result in tough scones, so be gentle!
Once the dough is brought together, roll it out to a thickness of about 2.5 cm. Use a round cutter to cut out your scones. Press the cutter straight down and don’t twist it, as twisting can prevent the scones from rising properly.
Once the scones are cut, place them onto your prepared baking tray. You should aim to make sure they are close together but not touching, as this will help them rise evenly during baking.
6. Brush with Egg Wash
For a shiny, golden finish, beat an egg and brush it over the tops of your scones before baking. This is an optional step, but it adds a beautiful golden color to the top of your scones. You can also use milk or cream as an alternative to the egg wash.
7. Bake the Scones
Place the scones onto the prepared baking tray and bake them in the preheated oven for 10-12 minutes. Keep a close eye on them, as baking times can vary depending on your oven. You’ll know the scones are ready when they are golden brown and have risen nicely.
The secret to perfectly baked scones is not to over-bake them. They should remain soft and slightly crumbly on the inside. Once baked, remove them from the oven and let them cool slightly on a wire rack.

The English Scones Recipe is a great place to start, and if you’re looking for a seasonal change, try our Blueberry Scone Recipe, which blends the sweetness of pumpkin with a spice kick.
Troubleshooting Common Problems with Your English Scones Recipe
Scone making can sometimes be tricky, but don’t worry! Below are some common issues that may arise, along with solutions to fix them:
Scones Too Dense?
Cause: Overmixing the dough or using warm butter.
Solution: To prevent this, mix the dough gently and keep your butter cold. The less you handle the dough, the fluffier your scones will be. Cold butter creates pockets of air, which lightens the texture.
Scones Not Rising Properly?
Cause: Low oven temperature or insufficient raising agent.
Solution: Preheat your oven to the correct temperature and ensure it maintains consistent heat. If you’re using plain flour, add enough baking powder (1 tsp per 150g of flour). Additionally, check that your self-raising flour is still fresh.
Scones Too Dry?
Cause: Not enough milk or overworking the dough.
Solution: If the dough feels too dry, add milk a teaspoon at a time until it just comes together. Be careful not to overwork the dough as this can result in tough scones. A slightly sticky dough is ideal for the best texture.
Serving Suggestions for Classic English Scones
Now that your scones are baked and golden, here are some ideas for how to serve them:
- Traditional Afternoon Tea: Serve your scones with clotted cream and strawberry jam for the ultimate British experience. The rich, buttery cream combined with the sweetness of the jam is an iconic pairing.
- Savory Scones: If you prefer savory treats, try adding herbs, cheese, or even bits of bacon to the dough for a savory variation. Serve them with soups or salads for a delightful meal.
- Lemon Curd: For a zesty twist, pair your scones with tangy lemon curd instead of jam. It’s a refreshing alternative that adds a burst of citrus flavor.
You can even top your scones with whipped cream or drizzle them with a glaze made from icing sugar and milk for a touch of sweetness.
How to Store and Reheat Leftover English Scones Recipe
If you happen to have leftover scones, here’s how to store and reheat them:
- Storing: Store your scones in an airtight container at room temperature for up to 2 days. If you want to keep them longer, you can freeze them for up to 3 months. To freeze, place the scones in a freezer-safe bag or container.
- Reheating: To reheat, wrap the scones in foil and place them in a preheated oven at 180°C for about 5-10 minutes. This will restore their warmth and keep them soft.
FAQ – About English Scones Recipe
Can I Use All-Purpose Flour Instead of Self-Raising Flour?
Yes, you can. If you don’t have self-raising flour, simply add 1 teaspoon of baking powder for every 150g of all-purpose flour to achieve the same result.
How Do I Make Dairy-Free Scones?
To make dairy-free scones, swap the butter for a dairy-free alternative and use plant-based milk like almond or oat milk. The texture might differ slightly, but they’ll still be delicious.
How Can I Make My Scones Extra Fluffy?
Use cold ingredients and be gentle when handling the dough. The less you mix and knead the dough, the fluffier your scones will be.
Conclusion
Making English scones at home is easier than you might think, and the results are so rewarding. Whether you’re hosting a tea party, treating yourself to a homemade snack, or simply exploring a new recipe, these scones will be a hit. Keep the dough handling gentle, use cold ingredients, and don’t forget the jam and cream! With this simple recipe, you’ll soon be enjoying fresh, buttery scones whenever you like.

